Once we have our desktop installed with Windows 7x 64, time to move to the next step.
- Installing VMware Workstation 11
About WMware Workstation
VMware Workstation is a test-and-development environment that allows systems administrators to create and run multiple operating systems simultaneously on the same PC.
Read more here about the produkt here
Download the latest binaries from VMware website
Pick a Typical installation.
The default installation location is fine as it is. But if you want you can change it as you like.
I would recommend to check for product updates on each start up for latest patches.
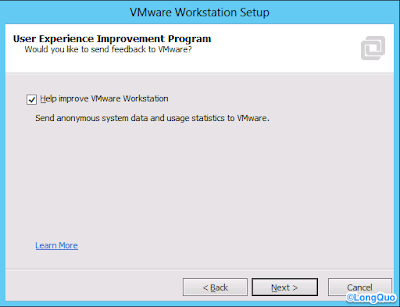
I recommend leaving the check on. By sending a little data. You help VMware become better and better.
Continue the installation until it finish.
When the installation is finished, start VMware Workstation with Administrative Privileges if you aren't a local Administrator, by Right-click and select Run as Administrator.
Click Help -> Enter a License Key... to unlock VMware Workstation.
Let's Configuring VMware Workstation by opening Edit -> Preferences...
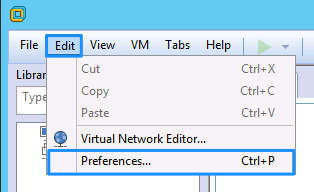
Change the Default location for Virtual Machines to a location that suites you.
Create a folder "VM" on your SSD drive and on the HDD. The default location should point to the HDD drive. This way our VM's get placed on the HDD and when we need performance we manual choose the SSD location.
Next click the Updates item in the inventory window and click on the Download All Components Now button.
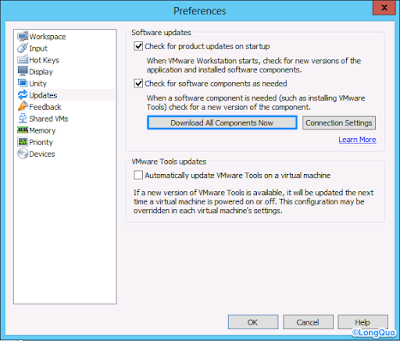
Next, click on the Memory item. Change the memory located to your coming VM's, by sliding the slider. Check your system how must ram it consume with Task Manager, and add 1 GB to that number. The added value should be the amount left for your OS.
Remember to click OK to save you changes.
Now it's time to set up the Virtual Networking environment. Open the Virtual Network Editor by clicking on Edit --> Virtual Network Editor...
The network editor give you three options for a network:
- Bridged: The VM will get an IP from same DHCP as your desktop PC. This make the VM visible on your home network, so you can reach them with by RDP.
- Host-only: Creates a virtual network between the Host and VM's. The VM's doesn't have a connection to the outside world.
- NAT: VMware workstation will act as a router.
The default VMnet0 network will be used temporary to set up the first VM's.
Next, we need a internal network for our LAN communication.
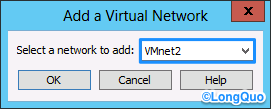
Press Add Network... button to create one.
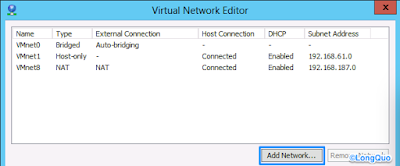
Select a network to add. Pick VMnet2 and press OK.
The new created network must be Host-Only. Deselect the option:
- Connect a host virtual adapter to this network
- Use local DHCP service to distribute IP address to VMs
Change the Subnet IP to 10.0.0.0 with a subnet mask of 255.0.0.0.
This give os plenty of IPs to fool around with.
Now we have two Virtual Networks to use:
- VMnet0 - network with Internet connectivity
- VMnet2 - Internal network only
Click OK to save the changes.
Next post we start creating our base template VM image.
- Building a VMware Workstation Homelab - Part 01: Introduction
- Building a VMware Workstation Homelab - Part 02: VMware Workstation 11
- Building a VMware Workstation Homelab - Part 03: Base Template
- Building a VMware Workstation Homelab - Part 04: Prepare the Template for Clones
- Building a VMware Workstation Homelab - Part 05: Domain Controller
- Building a VMware Workstation Homelab - Part 06: Gateway to the Internet
- Building a VMware Workstation Homelab - Part 07: Mail Server - Exchange 2010 SP2 on Windows 2012 R2


No comments:
Post a Comment